Why Aren’t My Push Notifications Working? Troubleshooting Guide for App Developers
Push notifications often fail silently, leaving developers guessing. This guide explains the full flow and covers common issues like expired tokens, misconfigured keys, permissions, and payload errors, with best practices to ensure reliable delivery.
Getting push notifications to work can be frustrating. Let's say you have followed the docs step by step, your app is building correctly, you have set up your Firebase or APNs, but something is not working as it should. And without real-time visibility into why push notifications are failing, debugging becomes just a game of guesswork.
In this article, we’re going to focus on the reasons why push notifications fail and how you can troubleshoot them. Whether you’re building your own notification system from scratch or implementing tools like Clix, this guide will provide answers to some of your questions.
The architecture of a push notification
Understanding the architecture of push notifications is crucial for troubleshooting because these notifications rely on a number of components involving both server-side and client-side elements.
Server-side components
The server-side components are responsible for deciding who to notify, when to notify them, and what the notification should say. This means setting up:
Backend server
The main role of the application’s backend server is to store device tokens, generate the notification’s content (what we refer to as the “payload”), and decide when it should be sent.
Push notification service (PNS)
A push notification service is the technology that an application uses to send messages to users. It is at the core of the push notification system. iOS relies on the Apple Push Notification service (APNs), whereas Android uses Firebase Cloud Messaging (FCM). The PNS receives the notification payload from the backend server and delivers it to the correct device using the token.
Client-side components
Client-side components are mainly on the user’s end (that is, on the device):
Mobile app
This refers to the app the user has installed on their device. When the app first runs, it registers with the operating system’s PNS (APNs or FCM) and receives a device token.
Device token
After registering with the respective OS, the PNS will generate a unique identifier (the device token). This token is what identifies a specific app, device, or environment. It will be sent to the backend server for storage. It's used in API calls to target push notifications to that specific device.
Tokens are not permanent; they can expire or become invalid (see the next section). When this happens, push notifications will inevitably fail. The application must request a new one from the push service to resume the token lifecycle.
App permissions
When the application is first installed, the user may be prompted to grant permission for notifications. Token registration is separate from this alert permission.
On iOS, the application registers with APNs and obtains a device token via registerForRemoteNotifications . Notification authorization via UNUserNotificationCenter only governs whether alerts, sounds, or badges are shown. With Android 13+, apps must request the POST_NOTIFICATIONS runtime permission to display notifications, but FCM can still issue a registration token regardless of the permission state.
Flow overview
Here’s a diagram of the entire flow.

- The user installs the mobile application on their device and grants it the necessary permissions.
- The operating system’s PNS generates a device token.
- This token is stored in the backend server for later use. Tokens are environment-specific (sandbox vs. production). Use the right gateway for the token you have.
- When you configure a notification, the backend server formats a payload and sends it to the push notification service (either FCM or APNs).
- The PNS then delivers the notification to the target device using the token generated and stored earlier.
Common reasons push notifications fail
A successful delivery of a push notification by a PNS is not always guaranteed. As mentioned, the architecture contains multiple components and platforms, which need to work together seamlessly. One small hiccup in the flow, and the notification won't be delivered.
More often than not, this failure is silent and invisible. Let’s explore the most common reasons behind it:
App setup and configuration issues
Let’s go through some of the most common issues you can run into.
APNs & FCM config
This is one of the most common points of failure for push notifications, especially when setting up the platform specific PNS. If your application is supposed to be catering to both Android and iOS devices, then you must configure the certificates or keys for both FCM and APNs, respectively.
For APNs, you need to ensure you have the .p8 auth key generated (this is a cryptographic key file) with Key ID + Team ID. As for FCM, you need to use FCM HTTP v1 with OAuth2 (Service Account JSON). Incorrect files/keys will prevent the server from authenticating with the PNS.
No permission request from users
As discussed above, applications explicitly ask users for permissions to send them notifications. If the app is not set up correctly to prompt the user for permissions or if the permission request flow is broken, notifications won’t be shown.
Invalid or expired tokens
The tokens that are generated when the app registers with the push service have a limited lifespan. When a user uninstalls the application or clears app data, or when there is an OS update, the device token becomes invalid. Apart from that, the PNS can refresh the device token at any point.
Therefore, if your backend server tries to send a notification using the previously stored token, the PNS will reject the request, as it will be invalid or expired. This happens especially if the mechanism you’re using for storing the tokens is a one-time event and there’s no provision for refreshing them.
User denied or disabled notifications
Remember, the user is in control here. So, if they deny the request for permission or revoke it later on, the push notification will fail, even if you've correctly set up the app. Also, some device settings, such as Do Not Disturb (DND), mute alerts.
On Android, use high‑priority FCM for time‑sensitive messages since normal priority may be deferred. For silent/background on iOS, include content-available: 1 and set apns-push-type: background.
Payload issues
The payload is the actual data that is contained in the notification. Malformed or huge payloads will not be sent. We will go into detail about each scenario below:
Invalid payload structure
Payloads need to have a defined structure. Those that don’t, end up getting dropped.
For APNs, payload must include an aps dictionary; title/body are optional (for example, silent content-available), except when you want a visible alert. If the payload is malformed, APNs will return an error.
This is not a major concern with FCM, as you can send notification or data-only messages; title/body are not mandatory for the latter.
Payload size
Push notification services (both APNs and FCM) have a payload size limit. For APNs, a regular push is capped at 4 KB (4096 bytes) and VoIP is at 5 KB. For FCM the max payload is approximately 4 KB (4096 bytes) for most messages and 2 KB (2048 bytes) for topics.
Time To Live (TTL)
Push messages have a configurable Time To Live (TTL). The default in FCM is 4 weeks but this can be tweaked accordingly to suit your specific use case. For example, time-sensitive alerts should have a shorter TTL whereas less urgent messages can be assigned longer delivery time. If a device is offline past the message’s TTL, FCM will drop this message and it won’t be delivered when the device comes back online.
Best practices for push notifications
Most of the issues discussed above can be prevented by implementing some engineering best practices, such as:
- Checking your application set-up: You will need to ensure that you have properly configured your application with the correct certificates, keys, and settings. Consider having a checklist for the set-up and test each item on the list thoroughly before deploying to production. Make sure to test with multiple devices and operating systems because what might work on iOS may not work on Android and vice versa.
- Handling device tokens: Tokens expire or become invalid for one reason or another. That is why you should implement a system that continuously refreshes and validates device tokens, such as a listener for token refresh events. With FCM,
onNewToken()is the callback method. It is part of the SDK and is normally triggered automatically whenever a new token is generated. Invalid/expired tokens should be removed from the backend storage to avoid potential breaking points. So, pay attention to server responses and do a cleanup. FCM returnsUNREGISTERED (404)orINVALID_ARGUMENTfor invalid/expired tokens, and APNs returns410 Unregisteredwith a timestamp. Prune these bad tokens automatically. - Requesting user permissions strategically: Users will always have the final say on whether or not they want to receive notifications from the application. They are more likely to grant permission if they see value in the app. So, refrain from prompting for notification permission at first launch. Instead, wait until they have interacted with the app for several sessions.
- Maintaining lean payload data: Ensure your payload only contains essential data. Oversized payloads that are more than the stated size will get dropped by the PNS.
- Using additional tools: Juggling all this can be a bit complicated, so you may want to consider using developer tools, as they can simplify the sending, managing, and tracking of push notifications.
Application Demo with Flutter, FCM, and Clix
Pre-requisites:
- Flutter SDK installed
- Firebase account
- Clix account (sign up here)
Step 1:
For a starter Flutter project, you can clone the basic reminder app template from this link.

Step 2:
Create a Firebase project in your console, and add Firebase to your Flutter app. The easiest way to do this is through Firebase CLI (ensure your Node.js version is >=20.0.0). Next, you need to log in, activate FlutterFire, and configure it. This will successfully add the required Google services files to all the platforms you’ve selected.
Then, add and the Flutter plugins for the Firebase products you’d like to use. For this project, we’ll add firebase_core and firebase_messaging to our pubspec.yaml file.
Initialize Firebase in your main.dart file. Call Firebase.initializeApp from the firebase_core package with the configuration from your new firebase_options.dart file.
import 'package:firebase_core/firebase_core.dart';
import 'firebase_options.dart';

void main() async {
  WidgetsFlutterBinding.ensureInitialized();
  await Firebase.initializeApp(options: DefaultFirebaseOptions.currentPlatform);
  runApp(const MainApp());
}
Step 3:
Add functions to handle the messaging, retrieve the device tokens, and request user permissions. You can find the full code for these functions on this finished branch.
Step 4:
In your Clix account, setup an organization and create a project. Within the project, navigate to the settings, where you’ll be able to obtain your public and secret API Key, as well as your project ID, which will be used in the Flutter application.
While you’re still within the project settings, add the Push Notification Sender configs. You can get these from your Firebase Console by choosing Project Settings → Service Accounts → Generate New Private Key. This will download a .json file, which you should save in Clix.
If you’re sending to iOS through FCM, you’ll also need to upload your APNs Auth Key to the Firebase Console under the Cloud Messaging tab. Uploading this file authorizes Firebase to send notifications via Apple servers. Go to Project Settings → Cloud Messaging and upload the .p8 file.
Step 5:
Configure Clix to your Flutter application. Add the clix_flutter plugin, and then initialize Clix in your main function.
await Clix.initialize(const ClixConfig(
  projectId: 'YOUR_PROJECT_ID',
  apiKey: 'YOUR_PUBLIC_API_KEY',
));
Add Capabilities (iOS only)
If you’re running the app on iOS, there is an additional step of adding push notification capability. Follow the following steps on the console.
- Select your app target.
- Go to the Signing & Capabilities tab.
- Click the + button and choose Push Notification from the list.
- Click the + button and choose Background Modes from the list.
- Then check ‘Remote notifications’.
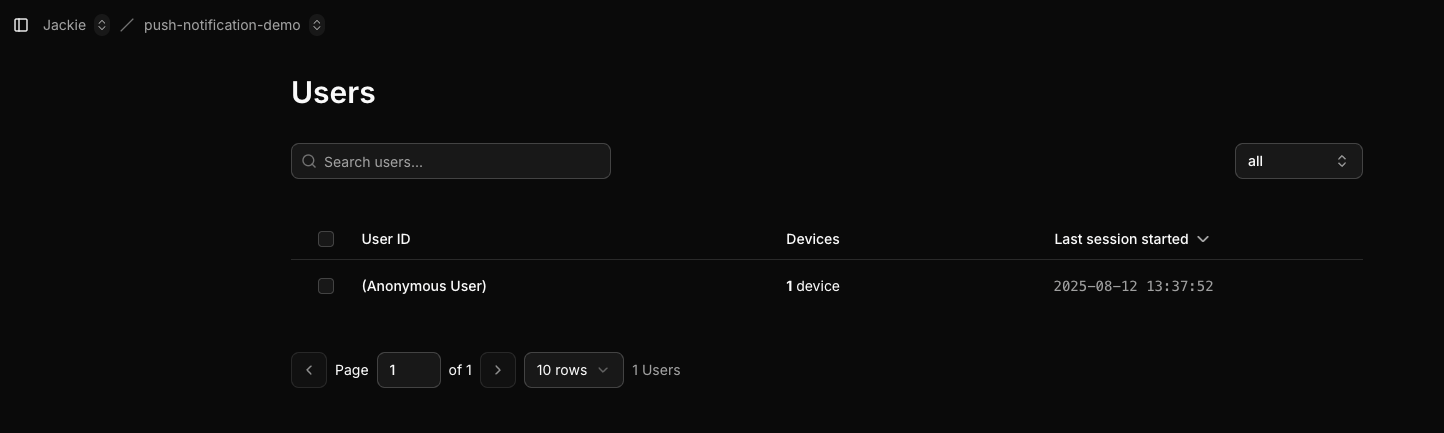
When you run the application, you should see the device added to the project. Command: flutter run
Step 6:
When you tap on one of the cards in the Flutter user interface, which we’ve implemented in step 1, the following code will be executed. It is basically the “send a push notification to the current device” helper function. See inline comments for what each code block does.
Future<void> _triggerPush(String title) async {
// When a device is registered with Clix it gets a unique deviceId.
// It helps Clix to know which device to send the push to.
final deviceId = await Clix.getDeviceId();
if (deviceId == null) {
if (kDebugMode) {
print("No Clix device ID available.");
}
return; // Exit early if device Id is null.
}
// This is the push payload
// It is JSON object which matches Clix’s API format.
final body = {
"push_notifications": [
{
"target": {"device_id": deviceId},
"title": title,
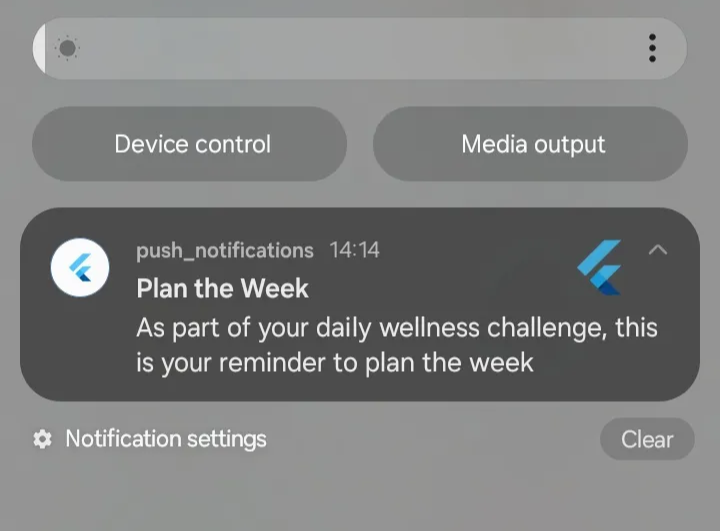
"body":
"As part of your daily wellness challenge, this is your reminder to ${title.toLowerCase()}",
},
],
};
// Send the POST request to Clix's push endpoint
// The clixApiKey used in the X-Clix-API-Key header is the secret API key.
// It is important to ensure that you don't expose this key in your client app
// Instead, route the call via the backend
final res = await http.post(
Uri.parse(clixUrl),
headers: {
"Content-Type": "application/json",
"X-Clix-API-Key": clixApiKey,
"X-Clix-Project-ID": clixProjectId,
},
body: json.encode(body),
);
if (kDebugMode) {
print("Push response: ${res.statusCode} ${res.body}");
}
}
If everything has been configured well, you should see a successful status “status” : “DELIVERY_RESULT_STATUS_SUCCEED” in the debug logs. Please note that Clix doesn’t support ‘background received’ feature and notification image yet.
Conclusion
Push notifications are important in relaying timely and relevant updates to your users. When properly implemented, they can drive engagement, improve user experience, and even boost revenue.
Delivering push notifications requires getting the fundamentals right. Developers need to ensure that device tokens are updated, payloads are structured well, and users have granted the necessary permissions. With tools like Clix, troubleshooting and managing notifications becomes far more predictable and less reliant on guesswork.
This is your recipe for success.